Baseball Pitchers Who Play Basketball

Are you a baseball pitcher coming out of basketball? Are you trying to implement a throwing program or even perhaps throw some bullpens? Are you noticing or being told that you throwing much slower than you know you have in the past? Are you hearing, “well, it’s because you haven’t thrown in a while”? Are you being told, “you haven’t made enough gains from last year to be on varsity this year”?

I am seeing this as an occurrence with some clients. Why does it happen? If you have been following me for any length of time or have ever had a lesson or service performed by me, you should know that I try my best to keep things simple. He is my attempt at a simple answer to a more complex issue… basketball is a jumping (vertical) sport. Jumping is a quad dominant movement. Pitching, at the beginning phases, is a hip loaded and lateral sport movement. If you have spent 8 – 10 weeks (or longer) working on vertical power movements, then you lateral power movements may be “turned off”.

If you are having trouble making the pitching gains early in the season, it may be because the pitching movement muscles need to be programmed to the “on” position. Let me know if you need some help with this issue.

Go to my scheduling app to get an appointment asap.

Wishing you health and success,

Joe

Fitness and Feel


“Bend your back more!”

“Follow through!”

“Reach out more!”

“Use your legs!”

“Get on top of the ball!”


Let’s all be honest here… we have heard these words of “encouragement” conveyed to baseball pitchers many times. I would venture to say quite a few of US (I am including myself) have even spoken these words. I am all for encouraging our athletes but can I let you in on a little secret? Many of those pitchers that we are “encouraging” simply cannot do these things that we are telling them to do.

I have come to realize there are two primary reasons our baseball players cannot do these things:

  1. They are not physically able to place their bodies in these positions. I call this not being fit to pitch.
  2. They don’t cognitively understand what we mean by these words.

Not Fit to Pitch

I have pitchers come to me for a pitching lesson for me to look at their mechanics to see why their arm is hurting. It only takes a handful of throws to realize they are trying to perform a high level athletic movement without the required physical strength or mobility.

I had one recent pitcher and his father do the exact thing above. They have taken pitching lessons from another instructor for a while but this pitcher’s arm began to hurt. After four or five throws it was evident that the pitcher did not possess the mobility in the back of his shoulder, spine, and opposite hip to complete a full follow through. Guess when his arm hurt – after ball release going into the deceleration or follow through phase.

This pitcher did not need more pitching lessons. He needed some athletic rehabilitation and arm care instruction.

Not Understanding the Words

If you have followed me for any length of time you are well aware that I claim to be a “student of pitching”. What I mean by that is I am on a journey of learning. I want to know more tomorrow than I do today. So at this point of my 25+ years of being a “student of pitching” I have come to the conclusion that pitchers need to feel more and think less. Those of us who are instructors have to be able to convey feel versus reciting pitching mantras that we have heard over the years. At the risk of becoming unpopular I must make this comment – I am not completely convinced that we has a baseball pitching instructor industry fully understand what some of these mantras actually mean.

Let me encourage you, whether you are a pitcher or a parent, to make sure you understand and can FEEL what we are asking you to do.

If I can ever be of service to you for your Baseball Health and Performance needs, please let me know.


“Dish Towel” Elbow

It is definitely “that time of year” again. In my rehabilitation business I am getting quite a few baseball players (mostly 13 – 15 years old) complaining with medial (inside) elbow pain when they get into the cock phase of throwing and / or transition into the acceleration phase. Their elbows are structurally okay but they still hurt when they attempt to throw.

What I am finding is their underlying issue is a functional problem with their shoulder. (For more information on the difference between functional and structural injuries you can download a free report here.) I have coined the phrase “dish towel” elbow. Simply stated the shoulder doesn’t have enough range of motion to get into a full cocking position but the hand still tries to get there. The elbow is caught in between the hand and the shoulder receiving the stress. Think about wringing out a dish towel. One of your hands twists the towel in one direction while the other hand twists the towel in the opposite direction. The towel twists in the middle. In this analogy one end of the dish towel (i.e. the shoulder) is in a fixed position because it cannot rotate any further – in other words it is stuck. The other end of the dish towel is the throwers hand. The hand end of the towel is being moved beyond the shoulder end of the towel creating a twisting or wringing effect in the middle (i.e. elbow).

The “fix” for this issue is to address the shoulder range of motion issues so the elbow isn’t receiving the extra stress. In a previous article on resetting and rebalancing range of motion after throwing I talked about what leads up to this loss of shoulder range of motion. Take a look at it if you haven’t done so. I also address this in the downloadable arm care report.


Home Page

What The Movie “Karate Kid” Taught Me As A Pitching Instructor

In 1984 the movie Karate Kid was released. For some of you reading this you may not be familiar with the movie. But for those of you who have seen the movie you will understand pretty quickly where this post is going.

In the movie the young character Daniel desires to learn karate. Daniel befriends an elderly gentleman named Mr. Miyagi from whom he desires to learn the martial art. Daniel is very excited when Mr. Miyagi agrees to assist him.

Daniel arrives for his first lesson and Mr. Miyagi has him washing and waxing cars and painting fences. Mr. Miyagi is very particular on how Daniel is to perform these activities. Daniel reluctantly performs these chores for multiple days until one day he gets frustrated and upset and decides to confront Mr. Miyagi about how he is tired of washing, waxing, and painting and when was he actually going to learn karate. Mr. Miyagi begins to demonstrate different martial art punches and strikes and tells Daniel to “paint the fence” and “wax on and wax off” as the punches are coming towards Daniel. Daniel has the proverbial light bulb go off in his head as he realizes he had been “learning” karate all along by breaking down the individual components and practicing them over and over and over. Daniel became even more motivated to learn after this experience.

If you have ever had a conversation with me or have read any of my other posts, you most likely have heard / read that I am a student of pitching. I strive to learn – learn about it AND learn how to teach it.

For the past couple of months I have been working with multiple groups of baseball and softball players (primarily pitchers) in my P.I.T.C.H. Program. These overhead athletes were like Daniel at first – excited to learn but became “frustrated” after a while because they were not “pitching”. But now they have made the connection of how each of the individual movement patterns / segments of pitching are being broken down and they are mastering them in anticipation of putting them all together in time for the upcoming spring season.

What they have learned started with mobility of the more common problem areas for overhead throwers. This new found mobility was quickly joined with the body segments required for stability. Lastly these “Daniel’s” are learning the movement of trunk acceleration. For them to see their trunk acceleration velocities go up each week reminds me of the scene in Karate Kid when Daniel’s eyes light up as he is able to defend Mr. Miyagi’s “punches” without thinking about it – instincts took over.

At the time this post is being written spring baseball and softball seasons are six to eight weeks away. If you or your athlete is a Daniel and needs help learning before the “big karate tournament”, contact me asap to begin the process before the season is already here.

Do It Yourself Training and Conditioning

Parents will often ask for my opinion on certain “programs” they hear about or read about. I recently was asked by a parent when his son should start the “thrower’s ten” program. (For those who may not be familiar with this specific program, it is a set of exercises utilized by rehabilitation professionals to help overhead athletes recover from injury.)

Our conversation took the direction of discussing arm care in general as it relates to younger pitchers. The main point that was made was simply that “arm care” in and of itself isn’t enough. A baseball pitcher must be able to recruit many different body parts to effectively and efficiently pitch.

To build on this point the pitcher was placed face down on a table. The pitcher was asked to raise his throwing arm towards the sky. The father’s hand was placed on the pitcher’s shoulder. The father could feel how the pitcher was using his shoulder to raise his arm. Isn’t that what is suppose to happen Joe? The shoulder is a part of the process but if it (shoulder) is the only thing working then it (shoulder) will be absorbing all of the stress.

To further illustrate this point of how if the shoulder is the predominant body part being utilized, a light weight was placed in the pitcher’s hand. He was then again instructed to raise his arm towards the sky. The result this time was his low back caved in and his opposite leg came off of the table. In other words the athlete had no stability / foundation over which to raise his arm.

After some instruction on how to recruit the other components of the kinetic chain the pitcher once again was asked to raise his arm towards the sky. The father placed his hand on the pitcher’s shoulder again and was able to immediately feel how the shoulder was the least active body part.

What is the point of this post? Simply to say that there are many options for “do it yourself” conditioning or strengthening. Just make sure you are training your body to dissipate the stress away from the smaller body parts. If you need any help with this, contact me here.

Wishing you health and success,

Joe

Importance of Resetting or Rebalancing the Pitcher

As a student of pitching who tries to help those who still have the dream and as an Athletic Trainer who treats overhead athletes, one of the most common issues I see with pitchers is significant loss of mobility. The areas of mobility loss I see the most involve the throwing shoulder’s ability to internally rotate (follow through) and the plant leg hip to internally rotate (trunk finish over front knee).

We know from numerous research studies that pitchers lose mobility from pitch one to their last pitch during a practice or a game. This is a natural occurrence. The issue becomes when the pitcher doesn’t purposefully restore / reset / rebalance that mobility. Tightness from a mid week bullpen sets in and is then added to the tightness from the weekend game which is then added to the second game of the weekend which is then added… See where I am going with this?

What does this look like? How does a pitcher know if he is losing mobility?

A couple of simple tests I use to help pitchers (parents and coaches also) see their motion loss include:

  • After having pitcher lay on his belly with his knees bent and the bottom of his feet pointed towards the sky, I will then gently rotate his hips by separating his ankles away from each other. If the plant leg hip doesn’t rotate as much as the opposite hip, I then know there is a loss of hip internal rotation.
  • For shoulder tightness I will simply have the pitcher place his throwing arm behind his back as far as he can. If he has a “hitch” getting his arm behind and up his back and / or his shoulder blade tilts forward (bottom of the shoulder blade sticks out), I then know that the back of his shoulder is tight.

One of two reasons usually brings the pitcher to see me…

  1. The pitcher (or parent) begins to notice that he begins losing control of his pitches. Upon questioning the pitcher (and parent) it is further revealed that the pitcher is missing high and in the later innings.
  2. The pitcher begins having front, top, and / or side of the throwing shoulder pain during the transition from the cock phase into the acceleration phase or back of the throwing shoulder pain during the follow through phase.

Break the cycle by purposefully restoring / resetting / rebalancing your hip and shoulder mobility.

Wishing you health and success,
Joe
“Tommy John” Injury Predictors

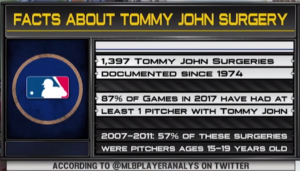
In a recent segment on MLB.com there was a great breakdown of the “Tommy John Epidemic”. Look at this graphic that was used on the segment…

These numbers are alarming to say the least. To imagine that between the years of 2007 – 2011 nearly 6 out of every 10 Tommy John surgeries was on a teenager is staggering to me.

As someone who desires to “help those who still have the dream”, I feel it is my obligation as a healthcare provider and as a pitching instructor to assist those who have what has been documented by ASMI as injury predictors for Tommy John.

Here is a list of mechanical flaws identified / areas to evaluate by ASMI that are consistent with increased elbow stress:

  1. Arm Position at Foot Plant
  2. Palm Down / High Elbow
  3. Direction to Home Plate
  4. Collapsed Front Knee at Ball Release

Arm Position at Foot Plant

To avoid increased medial elbow stress a pitcher needs to have his forearm somewhere between 12 o’clock and 2 o’clock as looking from second base / center field for right-handed pitchers and between 10 o’clock and 12 o’clock for left-handed pitchers.

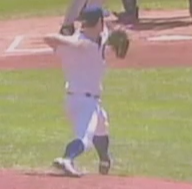
In this still frame of Mark Prior you can see his forearm is pointing at an approximate 3 o’clock position at foot plant. As he proceeds towards home plate, due to timing, his elbow will have increased stressed.


Palm Down / High Elbow

Increased torque and stress occurs at the medial elbow when a pitcher’s palm is facing the ground and / or the pitching side elbow is above the shoulder at foot plant. This is often related to a timing issue of the arm being a little late (see above).

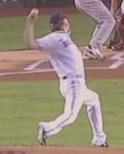
In the still frame of Adam Wainwright below you can see how his elbow is lifted higher towards the sky than his shoulder.

Direction to the Plate

Striding towards home plate (versus right-handed batter’s box for right-handed pitchers and left-handed batter’s box for left-handed pitchers) allows the pitcher to maximize hip rotation torque and transfer it to the ball. When a pitcher’s front leg lands closed, the twisting (rotational) torque is transmitted at higher levels to the elbow whereas landing more in line with home plate allows the “building blocks” of a pitcher to properly sequence without additional elbow stress occurring. Optimized sequencing is optimized timing.

Jered Weaver demonstrates a “throwing across your body” pattern in the still frame below. When he lands closed, the elbow receives higher stress levels. Notice his forearm being more between 12 o’clock and 2 o’clock as compared to the above pictures.


Collapsed Front Knee at Ball Release

When the front knee of a pitcher collapses at / near ball release, the torso and arm will innately want to try to contribute more due to not having a pivot point for the forward movement / momentum to continue towards home plate. There is already enough that the pitcher’s arm has to do. We don’t need to add more to its work load.


It is obvious that professional pitchers can be successful using the above movement patterns. But that success doesn’t negate that they are still demonstrating increased risk of medial elbow stress and potential injury.

The more injured baseball players I see as a healthcare provider and the more pitchers I see as an instructor I am becoming more and more convinced that there is a lack of “pitching fitness” among amateur pitchers. Often times there is an attempt to emulate a professional pitcher’s mechanics by younger amateurs who simply do not possess the needed “mobility / stability balance” required to optimize performance and minimize injury.


3 Common Upper Extremity Mistakes

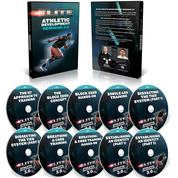
Today’s guest post comes from Mike Robertson on the release of Elite Athletic Development 3.0


12 dvd set


3 Common Upper Extremity Mistakes

When it comes to training, I’ve made darn near every mistake in the book.

I’ve given the wrong cues.

I’ve written crappy programs.

And sometimes I’ve been guilty of flat-out overcoaching an athlete.

So it only makes sense that I’ve made mistakes when it comes to training the upper extremities of my athletes.

As a coach that’s worked with numerous baseball and volleyball players in the past, I’ve tried to learn as much as possible to keep my athletes healthy.

Here are three mistakes I’ve made, and how I’ve improved upon them today.

Mistake #1 – Poor Core Control

My first coaching gig was as an assistant strength and conditioning coach at Ball State University.

I was working with our volleyball players, and many of them had back issues.

Looking back, this isn’t surprising.

When you have a really tall athlete with long appendages, it’s asking a lot of the core to control those limbs!

So when I trained these girls, I threw every movement-based core exercise at them.

Whether it was crunches, sit-ups, side bends or back extensions, anything I could do to get their core “stronger” was a win in my book.

Knowing what we now know, it’s easy to see the errors in my ways.

But I was only looking at how the core influenced the back – not how the core could influence the shoulder as well.

The first step in helping my overhead athletes is giving them sagittal plane core control.

I’m a big fan of supine core work early-on, especially with tall athletes.

First and foremost, I want them to feel their abs working. This is something that’s very undervalued these days.

Furthermore, when you perform a basic exercise like a 3-month PNF or dead bug, it’s very challenging on the core because that short core has to control those long limbs!

Prone variations work great as well, but we’ll talk more about about the value of reaching later on.

The last piece of the sagittal puzzle is building abs while simultaneously shutting off the lats.

Too often, when our overhead athletes go overhead, they extend their lumbar spine to stabilize.

My goal is to teach them to go overhead using pure shoulder motion, versus lumbar spine extension.

Once you’ve got a serious set of sagittal plane abs, you can then move to the frontal and transverse plane.

So let’s talk about that…

Mistake #2 – Failing to Train Integrated Rotation

When I first started, I thought all rotation was good rotation.

It didn’t matter if it was coming from the hips, lumbar spine or thoracic spine – if they were rotating, it was good!

Nowadays, I’m focused on not only where they rotate, but also how the control rotation.

If we look at the kinetic chain, here’s how I break things down:

  • The hips need to be able to rotate, but also demonstrate stability and control.
  • I want tri-planar core stability.
  • And I want the t-spine (and really, the thorax) to rotate effectively.

Hip rotation makes sense, as it’s a ball-and-socket joint. If the pelvis is positioned well, it allows those hip joints to do their thing.

The core is critical as well. I talked about this extensively before (https://robertsontrainingsystems.com/blog/alternating-function/) but in a well moving athlete, tri-planar core stability allows the hips and thorax to express their natural mobility

For overhead athletes, the most critical element of this is contralateral ab control.

If you want to throw a baseball with your right hand, you need left ab/core control to anchor your rib cage. Once you’ve got that left rib cage locked down, the thorax can rotate to the right.

And if you don’t have that, you’ll be forced to compensate through your lumbar spine.

Last but not least, we have the thorax. For years we’ve talked a lot about the thoracic spine, but the thorax is probably a better term.

We want and need our thorax to move well to set upper extremity position. If you can’t rotate the thorax, then the shoulder will be forced to compensate.


Mistake #3 – Not Performing Enough Reaching

The last piece of the puzzle is a lack of reaching exericses.

To be frank, for years I didn’t see the purpose of reaching exercises like push-ups in a program.

After all, couldn’t you just bench, row and chin if you wanted to get strong?

However, reaching does some really powerful things for our body.

First off, reaching trains the serratus anterior, which we know is critical for upward rotation of the scapula.

But perhaps more importantly, the serratus anterior can pull the rib cage back

In many athletes, I see a flat or extended thoracic spine. The natural kyphosis that should be there is not.

With a flat thoracic spine, you lose stability at the scapula.

And you know where this ends up – an unstable scapula leads to an unstable shoulder!

Reaching exercises, on the other hand, help restore that natural kyphosis to the scapula(e), and improve stability and control throughout the upper extremity.

As such, all of my overhead athletes have a healthy dose of reaching exercises in their program these days.

Summary

As you can see, I’ve made more than my fair share of mistakes when it comes to upper extremity training in the past.

However, hopefully by learning from my mistakes, you can help your patients, clients and athletes get better outcomes going forward.


unspecified-2-768x99


Mike Robertson and Joe Kenn just released their Elite Athletic Development 3.0 Seminar DVD set. It is on sale through 7/22/16 at midnight for $100 off. I would consider it a valuable resource for anyone who treats and trains overhead patients / athletes. I do not recommend it if you view clients’ movement patterns as uni-planar. However, if you do view and treat from a multi-planar and multi-system approach, you need to check it out here.

Integrative Corrective Exercise Approach

imageToday’s guest post comes from Evan Osar. Evan has spent over 1,000 hours refining an approach to corrective exercise and has compiled it in a program he calls the Integrative Corrective Exercise Approach. Evan and the producers at Fitness Revolution have agreed to offer my readers a special discount of $100 off this week only. More on his program at the bottom of the post.

The Functional Assessment

While there are any number of valid assessments that can be used, we must make our choice based on the type of information the assessment provides. For example, when assessing for common shoulder and hip dysfunctions one must look at the biggest causes of loss of optimal breathing and trunk stabilization, inability to maintain joint centration with subsequent loss of internal rotation in both the shoulders and hips, and poor loading strategies through the shoulder complex, trunk, and hip complex. (Evan is describing what my course attendees have heard me describe as “common things happen commonly.)

The purpose of an assessment is not to test the client for an entire hour, running them through a battery of tests to discover every single movement fault. The goal of the assessment is to help the rehabilitation or performance professional to determine the biggest driver of the client’s dysfunction. In other words, what is the greatest movement or stabilization dysfunction that is causing this individual’s dysfunction. While there can be several causes, one is likely to be the primary, while the others are likely to be secondary compensatory problems.

After performing a thorough assessment, what if the rehabilitation or performance professional chooses the wrong primary driver and chooses a corrective exercise approach based on this faulty premise? The worst case scenario is that the client does not improve, while the best case scenario is that the client improves a little, which for some clients will be all they need to resume their activities or accomplish their functional goals. Unfortunately, this strategy will not help many chronic pain sufferers or elite athletes, the two groups of individuals at the extreme ends of the functional continuum. These individuals will need a specific approach to improving their performance, which is why the tests and evaluations must be precisely administered and their results efficaciously interpreted to determine the priority of the intervention.

At times, despite our best intentions, an incorrect corrective approach may be administered. While corrective strategies can take weeks, months, or even years depending upon the severity, complexity, or intensity of the presenting issues, if the chosen approach is not demonstrating any functional progress within two weeks, it is likely not the correct approach or perhaps not the appropriate time for that part of the intervention, provided the rehabilitation or performance professional is confident that the client is doing their part in the process by performing their homework. Therefore, a new approach should be instituted and reassessed for its efficacy within the next two weeks following the introduction of the new strategy.


Learn Evan’s Integrative Corrective Program

I am really excited to share that Evan and our friends at Fitness Revolution have offered my readers a special $100 off Evan’s new program, The Integrative Corrective Exercise Approach. In this great program, Evan shares his proven system to help you assess postural and movement problems and develop a corrective exercise strategy.

The program is $100 off for my readers this week only! The offer ends Friday March 18th at midnight!

Click here to save $100 off Evan Osar’s Corrective Exercise System

image

To Hop or Not to Hop

There is a video being shared on social media showing a softball team incorporating a hop as the pitcher releases the ball when playing defense. The video continues to describe the scientific basis for this action. The purpose of this article is to dig a little deeper into the premise of the stretch shortening cycle.

The stretch shortening cycle is an active stretch (eccentric action) of a muscle followed by an immediate shortening (concentric action) of that same muscle. This concept may best be illustrated by thinking about the act of jumping as in basketball. A basketball player initiates the jump process by squatting to “pre-stretch” the thigh and hip muscles so they then contract with more force – similarly to stretching a rubber band prior to letting it go to fly across the room. The stretch shortening cycle, combined with ground reaction forces – what you push into the ground, the ground “pushes” back into you, is what allows the basketball player to produce a powerful jump.

But does the stretch shortening cycle affect reaction time? Reaction time can be negatively affected during prolonged bouts of maximal stretch shortening cycle activation (i.e. box jumping or plyometrics in the gym for extended repetitions). In the video (see below) you will notice that the softball team members are not maximally activating the stretch shortening cycle.

So, does submaximal activation of the stretch shortening cycle positively influence reaction time? Perhaps digging a little deeper into “what is reaction time?” may prove beneficial. Reaction time is simply the time it takes to initiate a response once a stimulus is received. Science tells us that there are three components to reaction time:

  1. Stimulus recognition (pitcher delivers the ball / hitter makes contact)
  2. Response choice (move left, move right, move up, move back, jump, etc.)
  3. Response engagement / activation (movement patterns to execute the response choice are initiated)

Any athlete that has ever trained with me will recall the phrase “negative movements”. Negative movements are motor actions that conflict with the intended movement goal. For example, if an athlete is attempting to initiate a movement into a certain direction or attempts to change direction, any movement that causes that athlete to shift his or her center of gravity contrary to the intended direction is spending energy but not making progress towards the intended direction. Thus, a negative movement occurs.

What the hop demonstrated in the below video is accomplishing is negating negative movements. Upon landing from the hop the muscles are pre-activated. This allows the athlete to move in any direction without wasting energy of having to react from a dead stop position. This hop is the modern day “get ready to anticipate” movement that many of us who played softball or baseball in yesteryear recognize as taking a step towards the plate as the pitcher released the ball.

So back to our question of does submaximal activation of the stretch shortening cycle positively influence reaction time? I believe the answer is yes. It can improve reaction time by negating negative movements.

Wishing you health and success,

Joe